
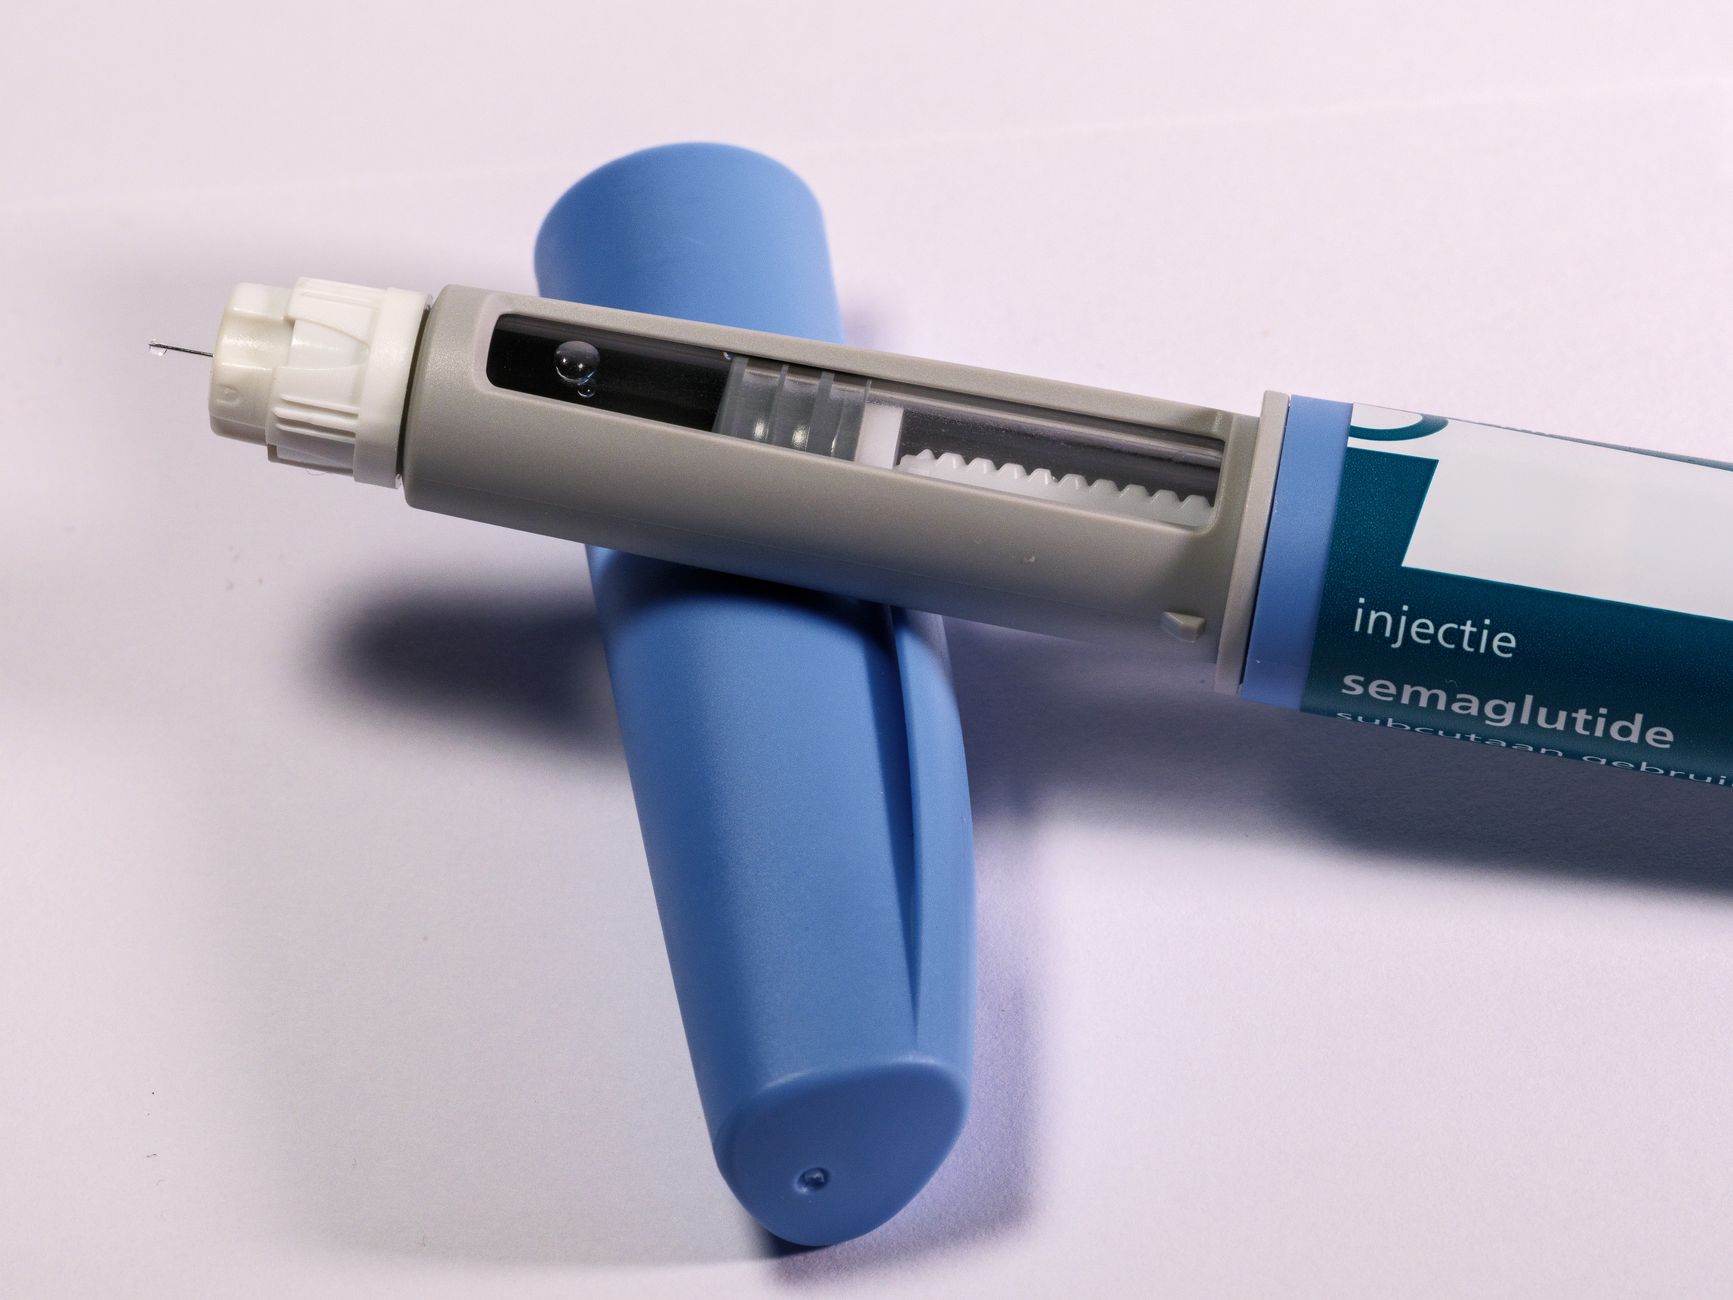
- Most research peptides studied for systemic effects are administered subcutaneously — it is simpler, less painful, and adequate for the small volumes involved.
- Intramuscular injection delivers into deeper, more vascular tissue and is generally reserved for larger volumes or specific research protocols; it carries a higher risk of hitting a nerve or blood vessel.
- Aseptic technique — hand hygiene, alcohol swabbing, never touching the needle, and using each needle only once — is the single most important factor for preventing infection.
- Insulin syringes (typically 29–31 gauge, 0.5 inch / 8–12.7 mm) are the standard tool for subcutaneous peptide injection because they combine fine needles with precise unit markings.
- Systematic site rotation prevents lipohypertrophy (lumpy tissue), bruising, and scarring that can alter absorption over time.
- Injectable peptides such as BPC-157, TB-500, and GLP-1 analogs are largely research compounds or prescription-only medicines; this article is educational and does not authorize self-administration.
Why does injection technique matter for peptides?
Peptides are short chains of amino acids that are typically fragile and poorly absorbed by mouth, because digestive enzymes break the peptide bonds before the molecule reaches the bloodstream. For this reason, most peptides studied for systemic effects — from BPC-157 to GLP-1 analogs — are administered by injection in research and clinical settings. Understanding injection technique is therefore central to understanding how these compounds are actually used.
Technique is not a trivial detail. The route of administration, the depth of the needle, the cleanliness of the process, and the accuracy of the measured dose all influence how a peptide behaves and how safely it can be handled. A poorly placed injection can cause pain, bruising, or tissue damage; a lapse in sterility can introduce bacteria and cause an abscess or systemic infection; and an inaccurate measurement can mean a dose that is far from what a protocol intended.
This guide explains the two main injection routes used for peptides — subcutaneous (into the fat layer under the skin) and intramuscular (into muscle tissue) — along with the equipment, aseptic method, and step-by-step technique for each. It also covers site rotation, storage, and the warning signs that something has gone wrong.
Before going further, an important clarification: most injectable peptides discussed here are classified as research chemicals and are not approved by the FDA, EMA, or equivalent agencies for human use. Prescription peptide medicines such as semaglutide or tirzepatide must only be used under medical supervision. This is for educational purposes only. Always consult a qualified healthcare professional before considering any injectable substance, and review our medical disclaimer.
Subcutaneous vs intramuscular: which route is used and why?
The two routes differ mainly in the tissue they target. A subcutaneous (SubQ or SC) injection deposits the solution into the layer of fatty tissue between the skin and the muscle. Absorption from this layer is slow and steady because subcutaneous tissue has relatively few blood vessels, which produces a gentle, sustained release into the circulation. An intramuscular (IM) injection places the solution deep into muscle, which is far more vascular, leading to faster absorption and the capacity to accept larger fluid volumes.
For the majority of research peptides, the subcutaneous route is the default. The volumes involved are small — often a fraction of a milliliter — and do not require the depth or capacity of muscle tissue. Subcutaneous injections are also easier to self-administer, less painful, and lower-risk because the needle stays in a shallow, relatively avascular plane away from major nerves and vessels. Peptides commonly studied for tissue repair or metabolic effects are almost always given this way in the literature.
Intramuscular injection is generally reserved for larger volumes, for compounds specifically studied via that route, or when a protocol calls for localized delivery near an injury site (a practice sometimes described in the TB-500 and BPC-157 literature, though clinical human evidence remains limited). Because muscle tissue contains larger blood vessels and nerves, IM injection carries a higher risk of accidental intravascular injection, nerve irritation, and deeper bleeding, and it requires more careful anatomical knowledge.
The table below summarizes the practical differences:
| Feature | Subcutaneous (SubQ) | Intramuscular (IM) |
|---|---|---|
| Target tissue | Fat layer under skin | Muscle |
| Typical needle | 29–31 G, 0.5 in (8–12.7 mm) | 22–25 G, 1–1.5 in (25–38 mm) |
| Angle | 45–90° | 90° |
| Volume tolerated | Up to ~1 mL comfortably | Up to ~2–3 mL |
| Absorption | Slow, sustained | Faster |
| Relative risk | Lower | Higher (vessels, nerves) |
The right choice depends entirely on the specific compound and the protocol described in the relevant research, which is another reason professional guidance is essential before proceeding.
What equipment do you need for a peptide injection?
Assembling the correct equipment before you begin is part of good technique. Gathering everything in advance keeps the process efficient and reduces the chance of contaminating a needle or vial while you search for a missing item.
For a subcutaneous injection, the standard tool is an insulin syringe with an integrated fine needle, typically 29 to 31 gauge and 8 to 12.7 mm (0.5 inch) long. Insulin syringes are marked in units (100 units per mL), which makes measuring the very small volumes used with peptides far more precise than a standard 1 mL syringe marked only in tenths of a milliliter. Common barrel sizes are 0.3 mL (30 units), 0.5 mL (50 units), and 1 mL (100 units).
The full checklist for a safe injection includes:
- Sterile syringe(s) — one per injection, never reused
- Bacteriostatic water for reconstitution (contains 0.9% benzyl alcohol as a preservative), or sterile water when a protocol specifies it
- Alcohol wipes (70% isopropyl) for the vial tops, injection site, and hands
- The lyophilized peptide vial, stored correctly until use
- A sharps container — a rigid, puncture-proof container for used needles
- Clean gauze or a cotton ball for light pressure after withdrawal
- Optional: nitrile gloves and a clean, dedicated work surface
Never reuse a needle: it dulls after a single pass through a rubber stopper and skin, which increases pain and tissue trauma, and reuse defeats sterility. A reconstitution calculator such as the free Peptide Lab tool can help you convert a target dose into the correct number of syringe units once the vial has been mixed. For IM injections, a longer, slightly wider needle (often 22–25 gauge, 25–38 mm) is required to reach muscle, and these are usually separate needle-and-syringe combinations rather than insulin syringes.
How do you maintain aseptic technique?
Asepsis means minimizing the introduction of microorganisms at every step. It is the single most important safeguard against infection, and lapses are the most common cause of injection-site abscesses and, rarely, serious systemic infection. Good aseptic technique is methodical rather than complicated.
Begin with hand hygiene: wash your hands thoroughly with soap and water for at least 20 seconds, or use an alcohol-based hand rub, and dry them on a clean towel. Prepare a clean, uncluttered surface and lay out your equipment. If you use gloves, put them on after hand washing.
Before piercing any vial, wipe the rubber stopper of both the peptide vial and the bacteriostatic water vial with a fresh 70% isopropyl alcohol wipe and let it dry for a few seconds — alcohol needs contact time and evaporation to be effective, so do not fan or blow on it. Clean the injection site the same way, wiping in a single outward spiral from the center and allowing it to air-dry before the needle touches the skin.
Throughout the process, observe the principle of never touching what must stay sterile: do not touch the needle, the plunger shaft, or the rubber stopper after cleaning. If the needle brushes against anything non-sterile — the outside of the vial, your finger, a countertop — discard it and start with a new one. Use each needle and syringe only once, and immediately deposit used sharps into a puncture-proof container rather than leaving them on the surface or attempting to recap them, which is a common cause of needle-stick injuries.
Finally, inspect your solution before every injection. A properly reconstituted peptide is usually clear and colorless; discard any vial that appears cloudy, discolored, or contains visible particles, and never use a product that is past its stability window. When in doubt, do not inject.
How do you reconstitute and measure an accurate dose?
Most research peptides ship as a lyophilized (freeze-dried) powder that must be dissolved in liquid before use. This step, called reconstitution, determines the concentration of your solution and therefore how many syringe units correspond to your target dose. Errors here are one of the most common — and most avoidable — sources of inaccurate dosing.
The standard diluent is bacteriostatic water, which contains a small amount of benzyl alcohol that inhibits bacterial growth and allows a reconstituted vial to be used over several days or weeks when refrigerated. To reconstitute, draw the chosen volume of bacteriostatic water into a syringe, insert the needle into the peptide vial at an angle, and let the water run slowly down the inside wall of the vial rather than blasting it directly onto the powder — peptides are delicate and forceful mixing can damage them. Do not shake the vial; instead, swirl it gently or let it sit until the powder fully dissolves.
The concentration is simply the peptide mass divided by the water volume. For example, a 5 mg vial reconstituted with 2 mL of water yields 2.5 mg/mL, which is 2,500 mcg per mL, or 25 mcg per unit on a 100-unit insulin syringe. To draw a 250 mcg dose you would fill the syringe to 10 units. Because the arithmetic is easy to get wrong under real conditions, a dedicated reconstitution calculator is strongly recommended, and logging each dose in a peptide tracker helps maintain consistency across a research cycle.
When drawing up a dose, pull back slightly past your target, then tap the barrel so air bubbles rise to the top and gently push them out until the plunger reaches the correct mark. Small microbubbles in a subcutaneous injection are not dangerous but they displace liquid and reduce dosing accuracy. If you are combining compounds, review our peptide stacking guide first, as not all peptides should share a vial or be mixed in the same syringe.
How do you perform a subcutaneous injection step by step?
The subcutaneous route is the most common for peptides and the easiest to self-administer. The preferred sites are areas with a comfortable layer of fat and easy access: the abdomen (at least 5 cm / 2 inches away from the navel), the outer thigh, and the back of the upper arm. The abdomen is often favored because it is easy to reach and pinch.
After completing hand hygiene, reconstitution, dose measurement, and site cleaning as described above, the injection itself follows a short sequence:
- Pinch a fold of skin gently between your thumb and forefinger to lift the fat layer away from the underlying muscle. This is especially important for lean individuals.
- Insert the needle at a 45–90° angle in a single smooth motion. With a short insulin needle, 90° is standard; use 45° if there is very little subcutaneous fat.
- Push the plunger slowly and steadily to deliver the solution. Slow delivery reduces stinging and tissue stretching.
- Wait a second or two after the plunger bottoms out, then withdraw the needle at the same angle you inserted it and release the skin fold.
- Apply light pressure with clean gauze if needed. Do not rub vigorously, as this can irritate the site and cause bruising.
Routine aspiration — pulling back on the plunger to check for blood — is generally considered unnecessary for subcutaneous injections in the shallow, low-vessel fat layer, and modern injection guidance for subcutaneous drugs such as insulin no longer recommends it. Immediately place the used syringe in your sharps container without recapping. A small drop of blood or mild transient stinging is normal; significant pain, a spreading welt, or persistent bleeding is not and warrants attention.
If you are new to injecting, practicing the mechanical motion with a healthcare professional first is the safest way to build confidence and confirm you have identified the correct tissue plane.
How do you perform an intramuscular injection step by step?
Intramuscular injection is technically more demanding and carries greater risk than the subcutaneous route, so it should only be undertaken with proper training and a clear anatomical understanding of the chosen site. It is used less often for peptides and is generally reserved for larger volumes or specific research protocols.
The most common self-injection IM sites are the vastus lateralis (the outer front of the thigh) and the ventrogluteal site (the side of the hip), both of which are away from major nerves and blood vessels. The deltoid (shoulder) is accessible but only suits small volumes. The classic upper-outer buttock (dorsogluteal) site is increasingly discouraged in clinical guidance because of the risk of striking the sciatic nerve.
The procedure differs from a subcutaneous injection mainly in depth and needle choice:
- Select a longer needle (commonly 22–25 gauge, 25–38 mm) capable of reaching muscle, sized to the individual's tissue thickness.
- Locate the site precisely using anatomical landmarks, and clean it with an alcohol wipe, allowing it to dry.
- Insert the needle at a 90° angle in one firm, quick motion, deep enough to reach muscle without hitting bone.
- Aspirate by drawing back gently on the plunger for a moment; if blood appears, withdraw, discard, and start again at a new site, because blood indicates the needle has entered a vessel. (Aspiration remains standard practice for IM injection precisely because muscle is more vascular.)
- Inject slowly, then withdraw at the same angle and apply gentle pressure with clean gauze.
Because IM injection reaches deeper, more vascular tissue, the consequences of poor technique — nerve irritation, deep bruising, or intravascular delivery — are more serious than with subcutaneous injection. This underscores why professional instruction is not optional for this route. Dispose of the needle immediately in a sharps container.
How do you rotate injection sites and store peptides?
Repeatedly injecting the same spot damages tissue over time. The most common consequence is lipohypertrophy — firm, lumpy thickening of the fat layer — which is well documented in people who inject insulin at the same site. Beyond being cosmetically noticeable, lipohypertrophy alters and unpredictably slows absorption, so a dose delivered into scarred tissue may not behave as intended.
To prevent this, adopt a rotation system. Keep successive injections at least 2–3 cm apart, and move systematically across the available sites — for example, working across different quadrants of the abdomen and alternating between the abdomen, thighs, and arms over a cycle. Keeping a simple written or digital log, such as a peptide tracker, makes rotation easy to follow and helps you notice early signs of tissue changes.
Storage is equally important because peptides are chemically delicate. In their lyophilized (powder) form, most peptides are relatively stable and are typically kept refrigerated, and sometimes frozen for long-term storage, away from light and heat. Once reconstituted, a peptide is far more fragile: it should be refrigerated at roughly 2–8 °C (36–46 °F), protected from light, and used within the stability window described for that compound — often a few weeks when mixed with bacteriostatic water. Avoid repeated freeze-thaw cycles of reconstituted solution, and never leave vials at room temperature longer than necessary.
Always inspect the solution before drawing a dose, and label reconstituted vials with the date they were mixed and the concentration. If you are unsure how the compound you are handling should be stored, consult the supplier's stability data and a healthcare professional rather than guessing. To understand why peptides are so sensitive in the first place, our overview of what peptides are provides useful background.
What are the risks and warning signs to watch for?
Even with careful technique, injection carries inherent risks, and it is important to recognize normal reactions versus signs of a genuine problem. Minor, self-limiting effects include a small drop of blood at the site, brief stinging during injection, mild redness, and occasional light bruising. These typically resolve within hours to a day and do not require intervention.
Warning signs that warrant medical attention include signs of infection — spreading redness, warmth, swelling, pus, or increasing pain at the site, sometimes with fever — which can indicate a local abscess or cellulitis. An allergic reaction, ranging from an itchy welt to, very rarely, difficulty breathing or facial swelling, is a medical emergency. Persistent bleeding, sharp shooting pain suggesting nerve contact, or a hard lump that does not resolve should also prompt professional evaluation.
There are also risks specific to the substances themselves. Most injectable peptides are research chemicals of variable purity; products sold outside a regulated pharmaceutical supply chain may contain contaminants, incorrect quantities, or endotoxins, none of which are controlled the way an approved medicine would be. The FDA has issued warning letters to companies selling unapproved peptide products, and quality cannot be assumed. This is a genuine safety concern independent of injection technique.
It bears repeating clearly: peptides such as BPC-157 and TB-500 are not approved for human use by the FDA or EMA, their long-term safety in humans is not established, and much of the evidence base comes from animal or preclinical studies rather than large human trials. Legal status varies by jurisdiction. Prescription peptide medicines must only be used under a clinician's supervision. This guide is provided for educational purposes only and is not medical advice; consult a qualified healthcare professional before considering any injectable substance, and review our full medical disclaimer.
Recommended products
Research peptides selected for quality and purity:
GHK-Cu
Anti-Aging Compound
Test your knowledge
Quick quiz · 6 questions
Peptide Lab — free calculator & tracker
Calculate your reconstitution, track your peptides and injections. Free, no credit card required.
Frequently Asked Questions
Are peptides injected subcutaneously or intramuscularly?
What size needle should I use to inject peptides?
Do I need to aspirate before injecting a peptide?
What water do I use to reconstitute peptides?
How do I avoid lumps and bruising from peptide injections?
Sources
- Frid AH, Kreugel G, Grassi G, et al. (2016). New Insulin Delivery Recommendations. Mayo Clinic Proceedings.
- Gibney MA, Arce CH, Byron KJ, Hirsch LJ. (2010). Skin and subcutaneous adipose layer thickness in adults with diabetes at sites used for insulin injections. Current Medical Research and Opinion.
- Shepherd E. (2018). Injection technique 1: administering drugs via the intramuscular route. Nursing Times.
- Sikiric P, Rucman R, Turkovic B, et al. (2018). Novel Cytoprotective Mediator, Stable Gastric Pentadecapeptide BPC 157. Vascular Recruitment and Gastrointestinal Tract Healing. Current Pharmaceutical Design.
- Diao L, Meibohm B. (2013). Pharmacokinetics and pharmacokinetic-pharmacodynamic correlations of therapeutic peptides. Clinical Pharmacokinetics.
- U.S. Food and Drug Administration (2023). Certain Bulk Drug Substances for Use in Compounding — Peptide products and warning letters. FDA.gov Regulatory Guidance.